Initial setup
Network configuration is needed when you use NinjaPCR for the first time. If you have not done yet, please refer to Initial Setup document.
Manage experiment profiles
You can create an experiment profile to run it just once or save it to use repeatedly.
A profile consists of one or more cycles. A cycle has some steps and repeat counts.
Each step has duration and temperature. If you need to cool or heat samples very slowly, you can set ramp time (shortest transition time) to a step. If ramp time is empty, NinjaPCR tries to change temperature as fast as possible.
If your need a complex profile with cycles with multiple patterns, click "More Options" button to add cycles. Temperature of the lid is 110 Celsius by default but you can customize it by changing "Heater Lid" value.
For example, the profile below is written as screenshot images below.
| x1 |
Initial Denaturation
95℃
2 minutes
|
|---|---|
| x35 |
Denaturation
95℃
30 seconds
Annealing
55℃
30 seconds
Extension
72℃
30 seconds
|
| x1 |
Final extension
72℃
10 minutes
|
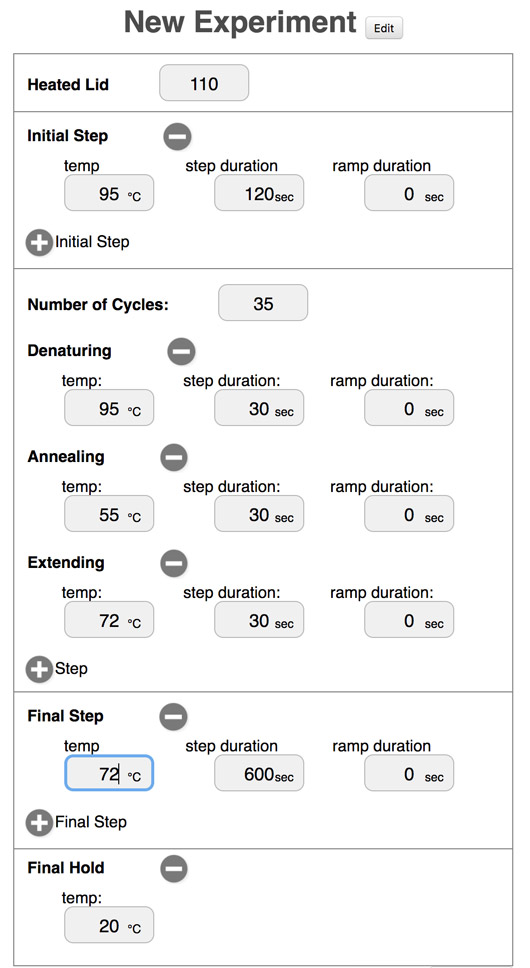
To save your edit, click "Save Preset" button.
Profiles are saved in storage area of your web browser. They are deleted by erasing data by browser settings. You can't save of load profiles in modes which don't allow usage of storage functionalities.

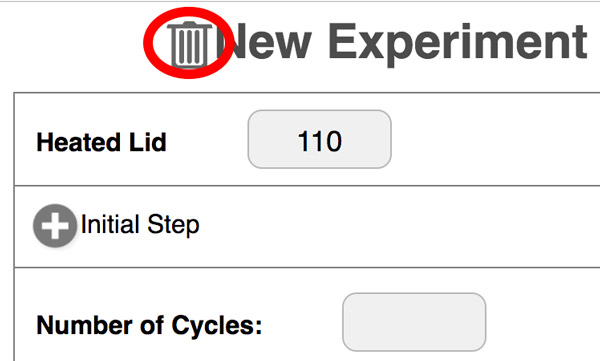
A profile can be deleted by the trash bin icon.
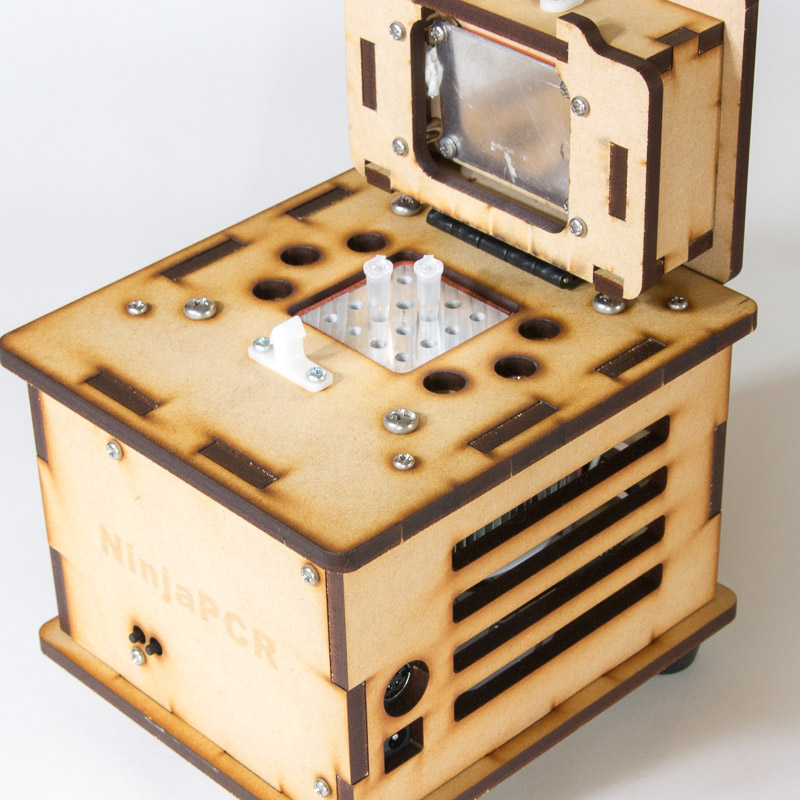
Set tubes
Open the lid.

Insert tubes to the well.

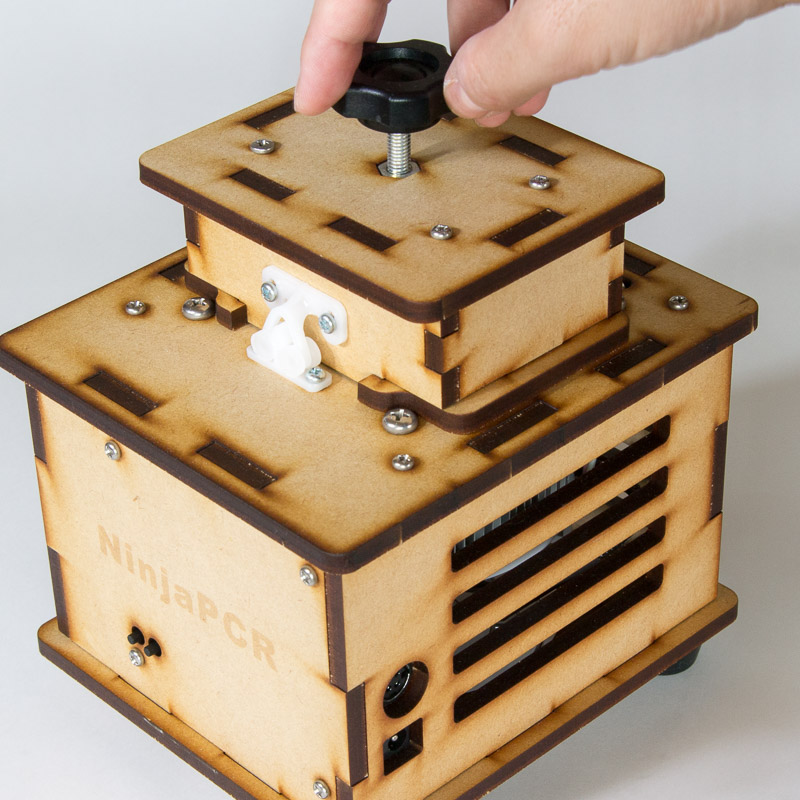
Close the lid.

Turn the knob clockwise to press tubes lightly with the lid.
Start an Expriment
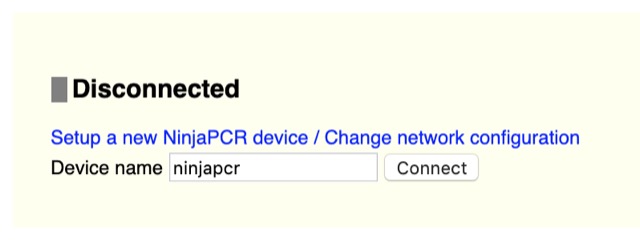
Boot NinjaPCR and connect the console to it. The process differs depending on the network mode.
Plug the power adapter into NinjaPCR and then into an outlet. Then open the console screen and input the "Device name" that you have specified when you configured the device and press "Connect" button.
Power the NinjaPCR while holding the "MODE" button on the front panel. Then it starts in access point (AP) mode.
(Learn more about the access point (AP) mode)
Join the network "NinjaPCR".
(Learn more about Wi-Fi configuration)
Open the console, select "Access point (AP) mode" and press "connect" button.
(About the console)

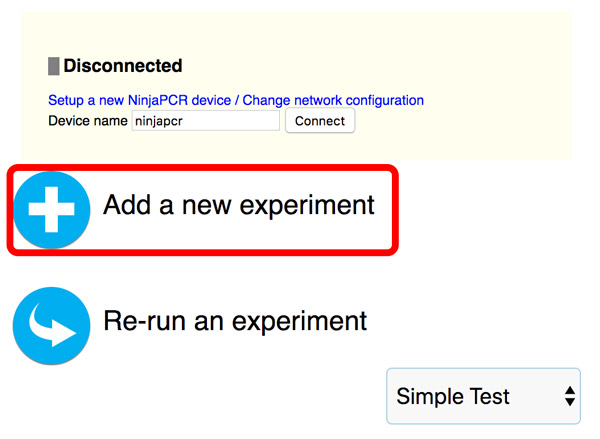
Open the profile screen. You can create a new profile by clicking "+" icon or load an existing profile by choosing from the dropdown and click the "Re-run" button.
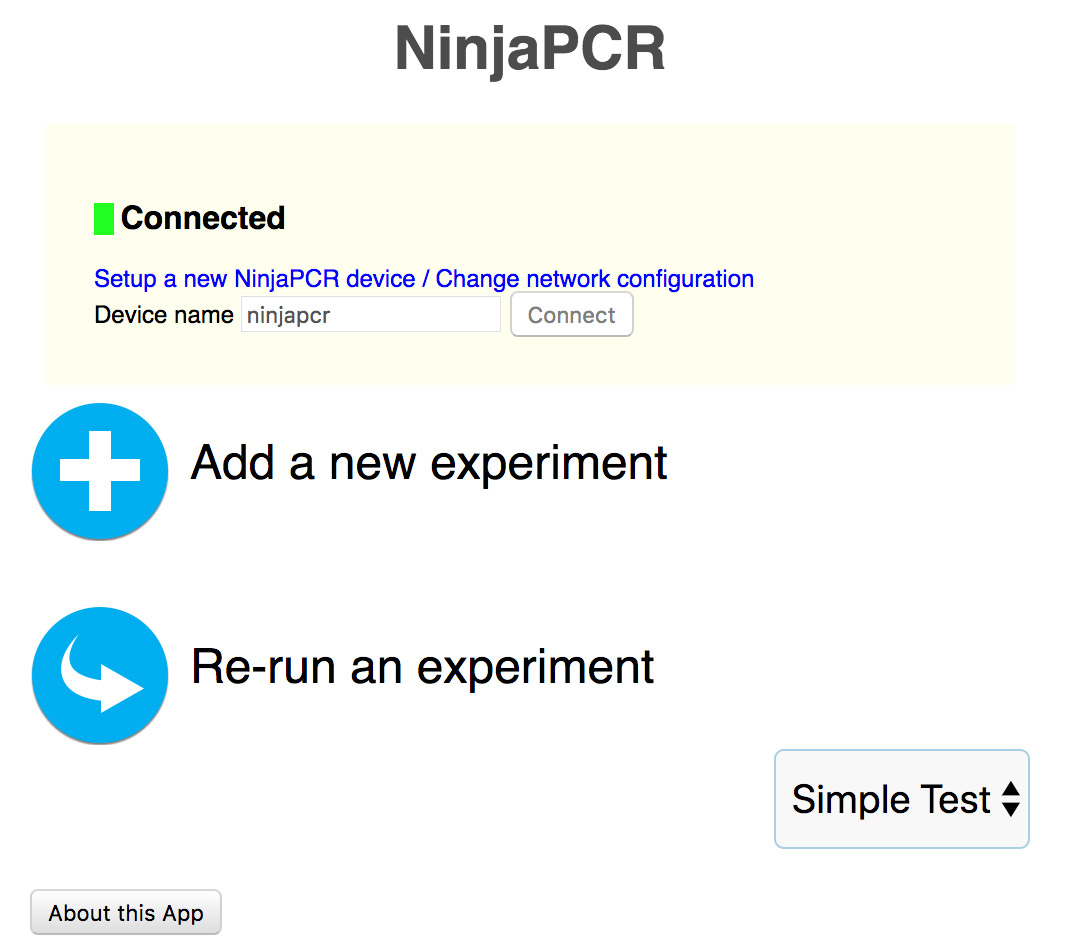
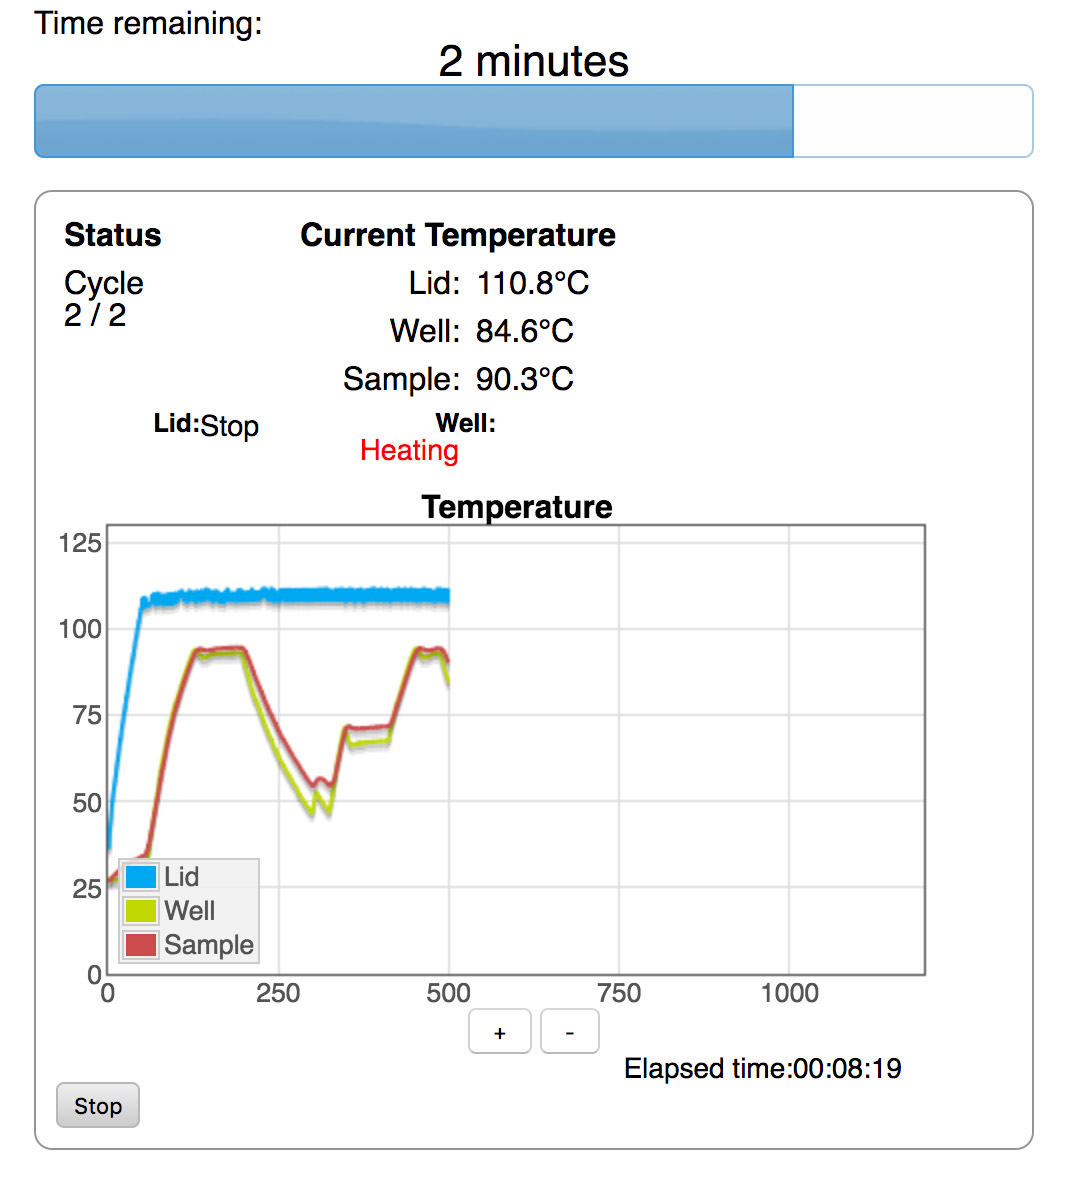
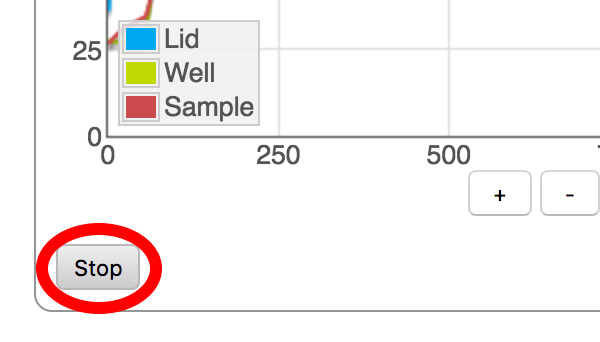
To abort the experiment, click the "Stop" button.
After an Experiment
When the profile is all done, "Finished" is displayed.
Open the lid and take out tubes. Please be careful not to touch the well or the lid. They are very hot after for several minutes!
Plug the power adapter out.